This blog post is part of a series where we’ll cover some practical ways of securing your ASP.NET web API with Azure AD authentication and a few authorization methods.
- Part 1: Access Control List (Single Client)
<--- - Part 2: Access Control List (Multiple Clients)
- Part 3: Application Roles
- Part 4: Delegated Permissions
Access Control List
There are 2 approaches to using access control lists.
The first one is using a single application registration that acts as both the API application and the client application. The authorization is implied. This is perfect for web APIs that will only ever be consumed by a single daemon application or service. This blog post covers this approach.
The second is using two or more application registrations. One API application and one or more client applications with an access control list that is configured. This is perfect of web APIs that may have multiple daemon applications or services that will be consuming it. The authorization is validating the calling client id against the client access list. This approach is covered in Part 2b: Access Control List (Multiple Clients).
Both approaches are also suitable if you do not need scopes or roles as part of your web API’s authorization policies.
Application Registration Setup
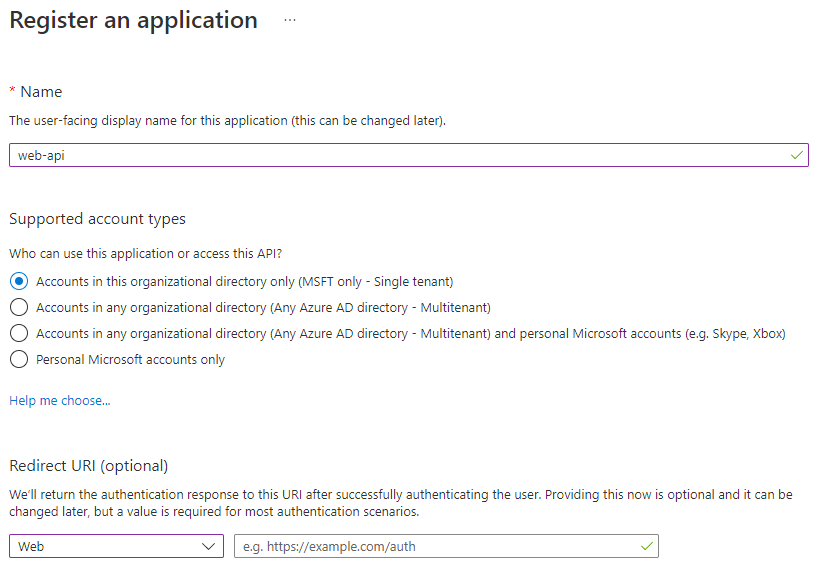
We will need to register an Application Registration for the ASP.NET web API that will serve as both the API and the client application.
From the Azure Active Directory blade, create an application registration.

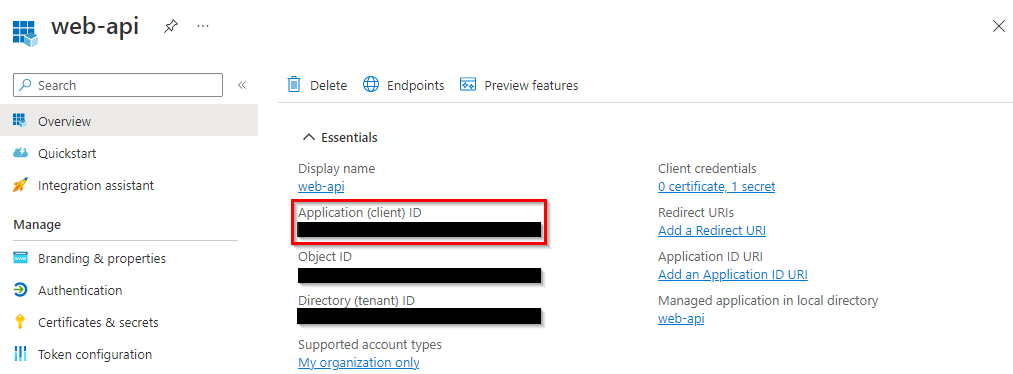
Copy the Application (client) ID and keep it somewhere safe for now.

Navigate to Expose an API and alongside Application ID URI, click Set. Set the Application ID URI to your desired value. We will be using the default value Azure provides which something looks like api://<application_id>.

Navigate to Certificates & secrets and add a new client secret. Give it a description and specify the expiry. Copy the secret value and keep it somewhere safe for now.

ASP.NET Setup
Add the the Microsoft.Identity.Web package to your ASP.NET project.
dotnet add package Microsoft.Identity.Web
Add the following lines to the top of your Program.cs class file.
builder.Services
    .AddAuthentication(JwtBearerDefaults.AuthenticationScheme)
    .AddMicrosoftIdentityWebApi(builder.Configuration.GetSection("AzureAd"));
Then add the following lines near the bottom of your Program.cs class file.
app.UseAuthentication();
app.UseAuthorization();
Finally, add the following JSON to your appsettings.json. Populate TenantId with your Azure AD tenant ID. Populate ClientId with the application registration’s application (client) id that we copied earlier
{
  "AzureAd": {
    "Instance": "https://login.microsoftonline.com/",
    "TenantId": "00000000-0000-0000-0000-000000000000",
    "ClientId": "00000000-0000-0000-0000-000000000000",
    "AllowWebApiToBeAuthorizedByACL": true
  }
}
The AllowWebApiToBeAuthorizedByACL property set to true will enable the Allowed Client List (ACL) authorization and the ClientId will serve as the “implied” ACL. Meaning that only the application registration with the same client id that is specified in the appsettings.json can access the resource.
We are telling the web API to ignore scopes or roles because the client credentials flow uses the ./default scope and is not present in the access token.
Forgetting to set the
AllowWebApiToBeAuthorizedByACLproperty will result in an500 Internal Server ErrorofIDW10201: Neither scope or roles claim was found in the bearer token.
Source Code
All the source code can be found in the supplementary repo.
https://github.com/ryanmichaeljames/secure-asp-net-web-api
Testing with Postman
Using Postman, create a new request and navigate to the Authorization tab. Set the type to OAuth 2.0 and populate the configuration options with the following values.
- Grant Type:
Client Credentials - Access Token URL:
https://login.microsoftonline.com/<TENANT_ID>/oauth2/v2.0/token - Client ID:
<CLIENT_ID> - Client Secret:
<CLIENT_SECRET> - Scope:
<APP_ID_URL>/.default - Client Authentication:
Send client credentials body
Click Get New Access Token and then click Use Token.

Finaly, test your the authorization by clicking Send. If you followed along closely you should be getting a successful response.

