So you’ve setup you own personal GitHub Pages site and bought a custom domain from Namecheap, now what? In this blog post I’ll show you how to configure your GitHub Pages site to use your new custom domain in less than 5 minutes.
Namecheap
First we will configure the DNS settings for your custom domain through Namecheap’s domain control panel.
- Navigate to your domian list and click Manage on the domain you wish to configure.

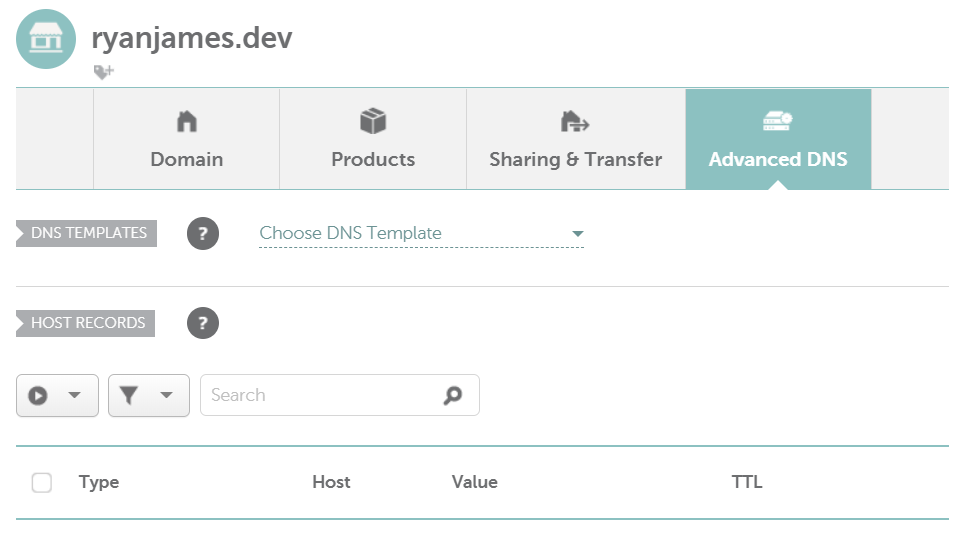
- Click on the Advanced DNS tab and Scroll down to Host Records section.

- Update the CNAME record by setting the value to your GitHub Pages repository, in my case it was
ryanmichaeljames.github.io., and leave TTL asAutomatic.

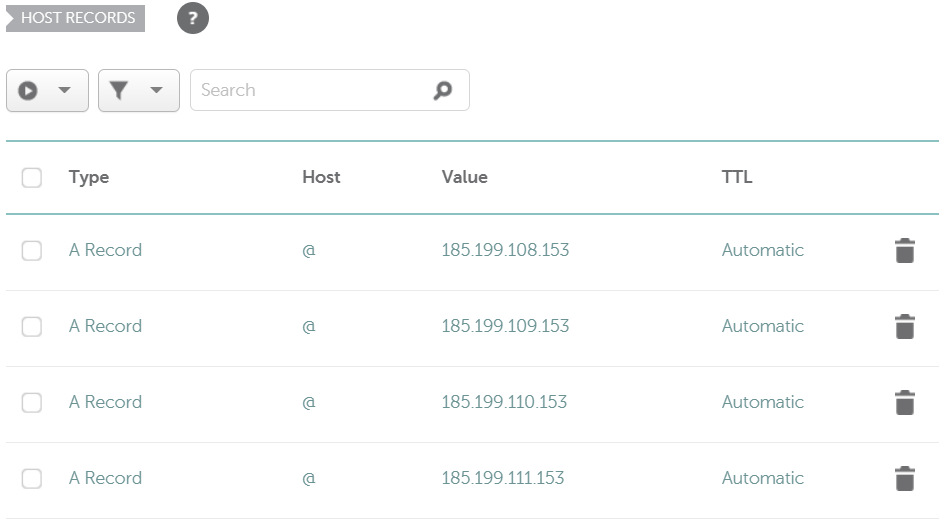
- Next we’ll add a few A records with the GitHub’s IP addresses and set their TTL to
Automatic.185.199.108.153 185.199.109.153 185.199.110.153 185.199.111.153
Next we will configure your GitHub Pages site.
GitHub
Finally lets configure your GitHub Pages site to use your custom domian and enable SSL.
- Navigate to your GitHub Pages site’s repository and click on the Settings tab and scroll down to the GitHub Pages section.

- Under Custom domain enter your new domian name and click Save.
 A file named
 CNAMEhas been added to your repository.

- Finally check Enforce HTTPS to enable SSL for your site.

Don’t forget to include
wwwin your custom domain name. This will prevent theERR_CERT_COMMON_NAME_INVALIDerror when you browse towww.<domain>.<tld>.
Easy as!
Sorted! You should now have both your GitHub Pages site and your DNS setup. All you need to do is test that it works.
It may take up to 24 hours for your DNS configuration to propagate and for you to successfully browse to your site using your custom domian. For me, it took about 30 minutes.
